Changing the source
Both mid-IR and near-IR sources are available for your spectrometer. This procedure explains how to switch from one kind of source to the other.
| When changing infrared sources, you must adjust the voltage DAC setting to get consistent power. A Thermo Fisher service representative can do this for you. |
Time needed: 25 minutes or less
Tools needed:
- 4-in-1 tool (included with your instrument)
- Finger cots, gloves, or laboratory tissue
- Alternate or duplicate source
| Use only Thermo Scientific-certified replacement parts. Never touch a source element with your bare fingers; skin oils or other deposits on the element will shorten its life. Always use clean finger cots, gloves, or clean laboratory tissue when handling a source. |
A spare source, or an alternate source, can be stored in a holder in the same compartment as the 4-in-1 tool above the desiccant compartment.
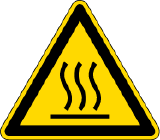 |
Avoid hot surface hazard. The source becomes extremely hot when the instrument is powered on. Always allow the source to cool for at least 15 minutes after the instrument is powered off before you work with it. |
- Turn off your instrument, wait 15 minutes for the source to cool, and then remove the Smart Accessory or open the sample compartment cover.
- Use the 4-in-1 tool, with the small Phillips bit installed, to loosen the screws that hold the source in place. The screws are captive, so you only need to loosen them until they spin freely.

Do not twist the source as you move it and do not touch the electrical contacts or the source element.
- Remove the current source

- Insert the new source.

- Use the 4-in-1 tool, with the small Phillips bit installed, to tighten the screws that hold the source in place. Do not overtighten the screws.
- Turn on your instrument and start OMNIC Paradigm software.
- Make sure the system has been on for at least 15 minutes (one hour for best results), then align the instrument.