Internal Pressure Relief Valve Removal
Issue
Internal Pressure Relief Valve Removal
Environment
- ThermoFlex 900
- ThermoFlex 2500
Resolution
1) Power off chiller by first pressing power button on front panel display and then moving the rocker switch on back panel to off position
2) Unplug power cord to chiller.
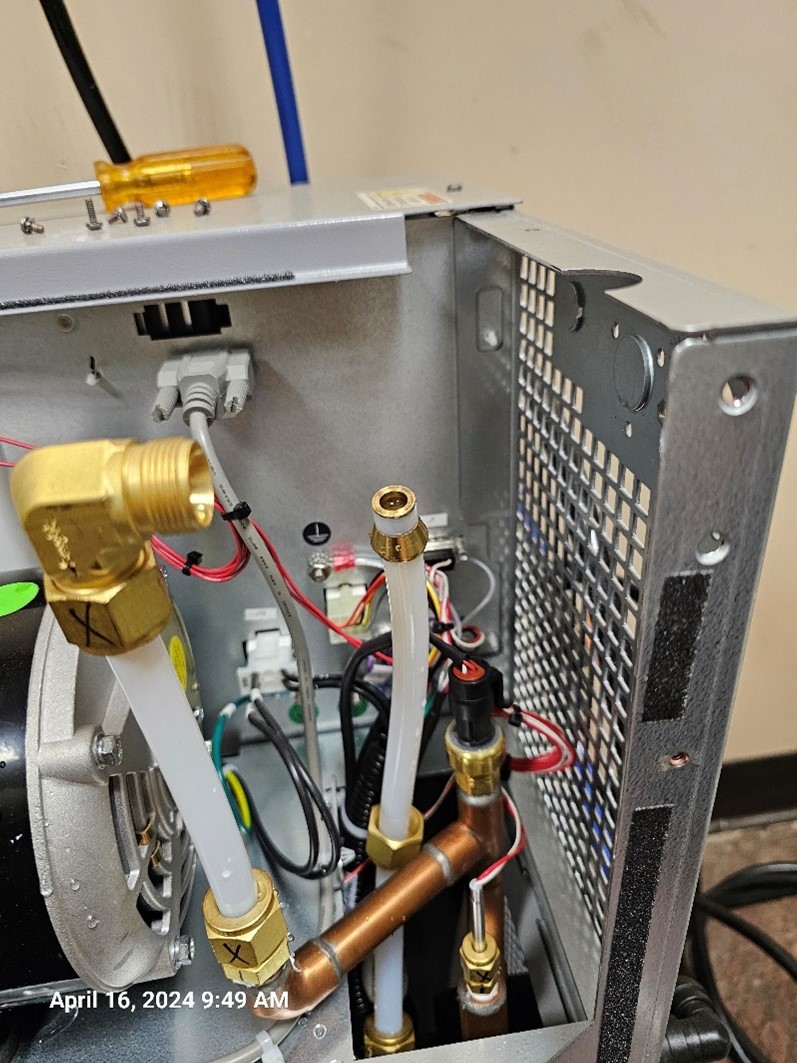
3) Remove the Right Side Panel. The internal pressure relief valve will be accessible from the right side of the chiller.
a) Use a Philips head screwdriver to remove the 5 #6-32 x 1/4" screws indicated in the illustrations below.
b) Slide the right panel back approximately one inch, then lift slightly from the rear to disengage the panel's two tabs from their slots.
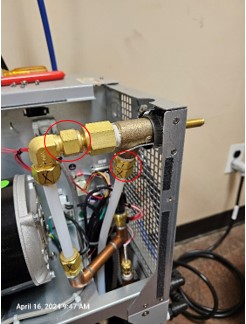
4) Loosen the Swagelok Nuts to remove input and output to pressure relief valve. Water leakage should be minimal unless water reservoir is filled excessively high.
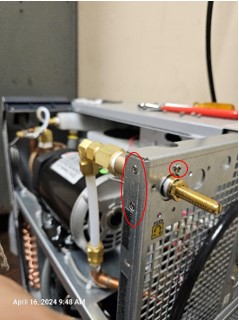
5) Remove 2 small screws of side and 1 long screw from back of chiller.
6) Pressure relief valve and bracket can now be removed from chiller.
7) Remove valve from bracket by bending tabs outward and loosening the hose clamps.
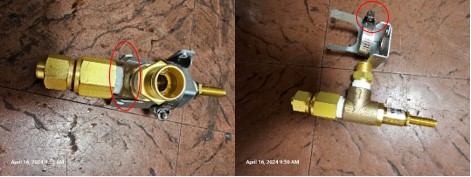
8) Disassemble valve by loosening nut assembly.