Analyze Samples
Use OMNIC Paradigm software to operate the microscope and to analyze samples. Typically, you will analyze your sample by following these steps:
- Prepare and load the sample.
- Capture a visual image of the sample surface. This image is called a mosaic.
- Collect a background spectrum.
- Analyze the sample.
With OMNIC Paradigm software, you can either set up and use the microscope with automation features to help you light the sample and bring it into focus, capture a mosaic, and locate a background point, or you can run the microscope manually, without automation, and visually inspect your sample before capturing any visual images or data.
In either case, the first step is to load your sample.
Load a sample
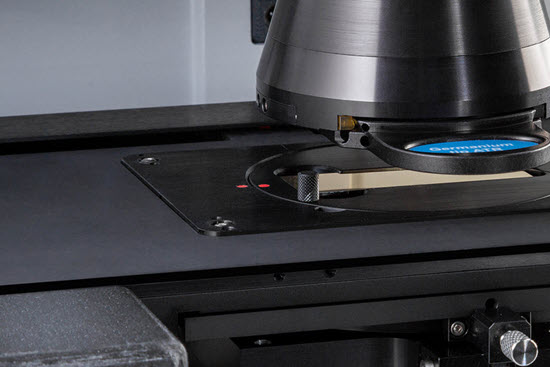
Eject the stage so that you have more access to the stage to position your sample. If your sample is small and fits in position easily, you can position the sample without ejecting the stage.
To insert a sample
- In the software, click Eject Stage. Ejecting the stage lowers the stage and moves it out to make it easier for you to load a sample.
- Insert the sample slide. The stage fits a universal sample holder. Use the red indicators to properly orient the sample holder.
When your sample is installed, you are ready to begin the session and collect a mosaic. If you ejected the stage, the stage will move back into position automatically when you begin the session. You can leave the stage ejected until you start the session.
Prepare your measurement settings
When your sample is in place, review your measurement settings on the Dashboard. The most commonly used settings are shown at the top and you can view additional, advanced settings if you click the More button.
For more on each of the measurement settings, see the OMNIC Paradigm software User Guide.
- To simplify your microscopy session by using the automation features, select a mosaic type from the Mosaic Capture list and select Autofocus before capture. If you are using the RaptIR sample holder, select Use the fixed reference location on the RaptIR sample holder in the background settings.
- To run your session manually, clear the selection for Autofocus before capture and select Custom Mosaic from the Mosaic Capture list.
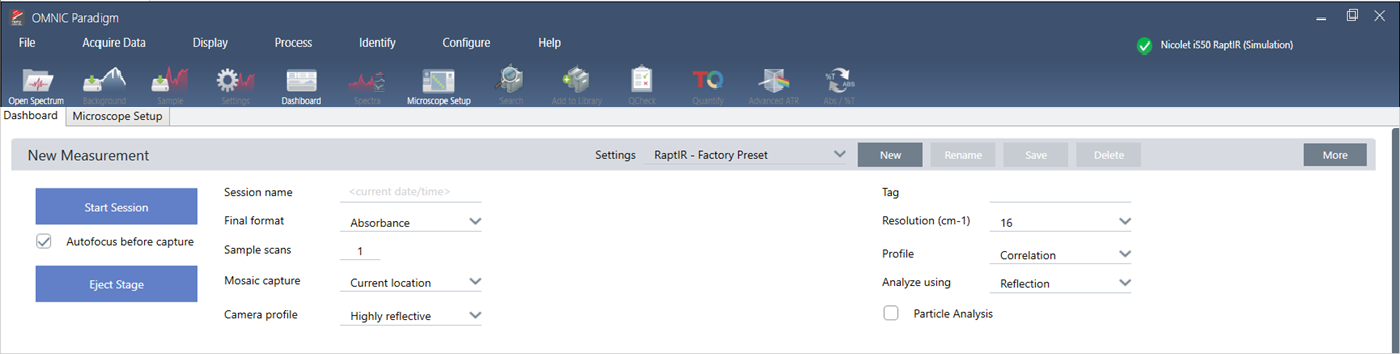
Select Particle Analysis to analyze groups of small particles. With this option selected, the particle analysis tools will be present in the map view. Clear this Particle Analysis selection to instead analyze areas, lines, and individual sampling points.
If you are using the 40x objective with the manual focus ring, make sure that the focus ring is set to the 0 position. An incorrectly positioned focus ring may interfere with autofocusing.
Review your background settings
Review your settings for background collection before you begin your session.

| Setting | Description |
|---|---|
|
Use the fixed reference location on the RaptIR sample holder |
The RaptIR sample holder has built-in reference points for transmission and reflection analyses. Select this option to automatically move the stage to the reference location after capturing your initial mosaic. This option is not available if you selected Custom Mosaic in the Mosaic Capture list. See "Measure a background spectrum" for details. |
|
Match sample scans |
If selected, the number of scans for the background collection is the same as the number of scans used for the sample measurement. |
|
Set background scans |
Select to use a different number of scans for the background than for the sample. |
|
Measure background before each region |
If selected, the software will measure a new background before each new region of the sample. For example, if you have three area regions in your sample measurement, with this option selected, the software collects a new background before each area. Note that a set of points that use the same measurement settings is considered a single region. |
|
Measure background once for entire sampler |
With the option selected, a new background is collected only when the measurement settings change. For example, if you have this option selected, if you measure three areas in one sample collection and they all use the same measurement settings, only one background is collected. |
Capture a mosaic
When your sample is in position, capture a mosaic. A mosaic is a visual image of your sample surface. The camera captures a series of small, high-resolution images and stitches them together into a single mosaic, giving you a large image of the sample surface that you can use for your analysis. The mosaic acts as a workspace for your analysis, where you can explore regions of interest and specify areas and points for your IR data collection.
In general, when you are analyzing a sample, you will collect a low-magnification mosaic image with a 4x or 10x magnification objective, adjust your settings as needed, then if needed, capture a high-magnification mosaic of a smaller area using the 15x or 30x objective. When you have captured a mosaic, draw regions or select particles, and begin
measuring data.
Capturing a mosaic requires you to review your collection settings, choose a location for the mosaic capture, and click Start Session.
To capture a mosaic
- On the dashboard, select Autofocus before capture and review your session settings. With this option selected, the software automatically illuminates the sample and brings it into focus. Clear the selection to focus manually instead.
- Select a location from the Mosaic Capture list. This tells the software where to find your sample and where to capture the mosaic. To start the session without automatically collecting a mosaic, select Custom Mosaic.
- Click Start Session. The stage moves your sample into position and brings it into focus, and the software collects a low magnification mosaic and then changes objectives to the high-magnification objective. If you selected Use the fixed reference location on the RaptIR sample holder, the software captures a high-magnification snapshot and then the stage automatically moves to the reference location to collect a background measurement.
If you selected "Custom Mosaic" from the Mosaic capture list, the software switches to the Session view without capturing a mosaic.
Measure a background spectrum
Before you collect sample data, measure a background spectrum.
The RaptIR sample holder features built-in reference points to use for your background measurements. If you selected Use the fixed reference location on the RaptIR sample holder, the stage automatically moves to the reference location and takes a mosaic snapshot. You can then place a background point as usual.
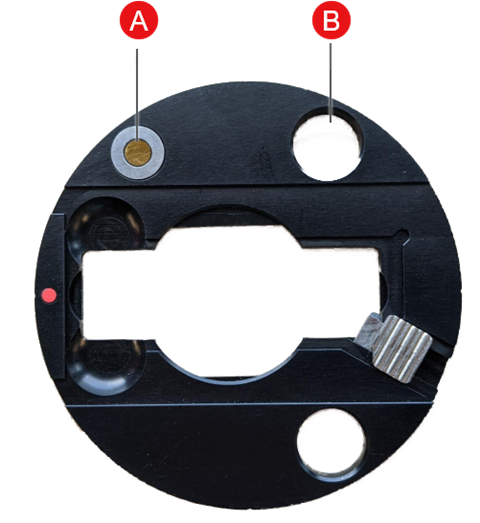
| A | Reference point for reflection analyses |
| B | Reference point for transmission analyses |
To measure a background spectrum
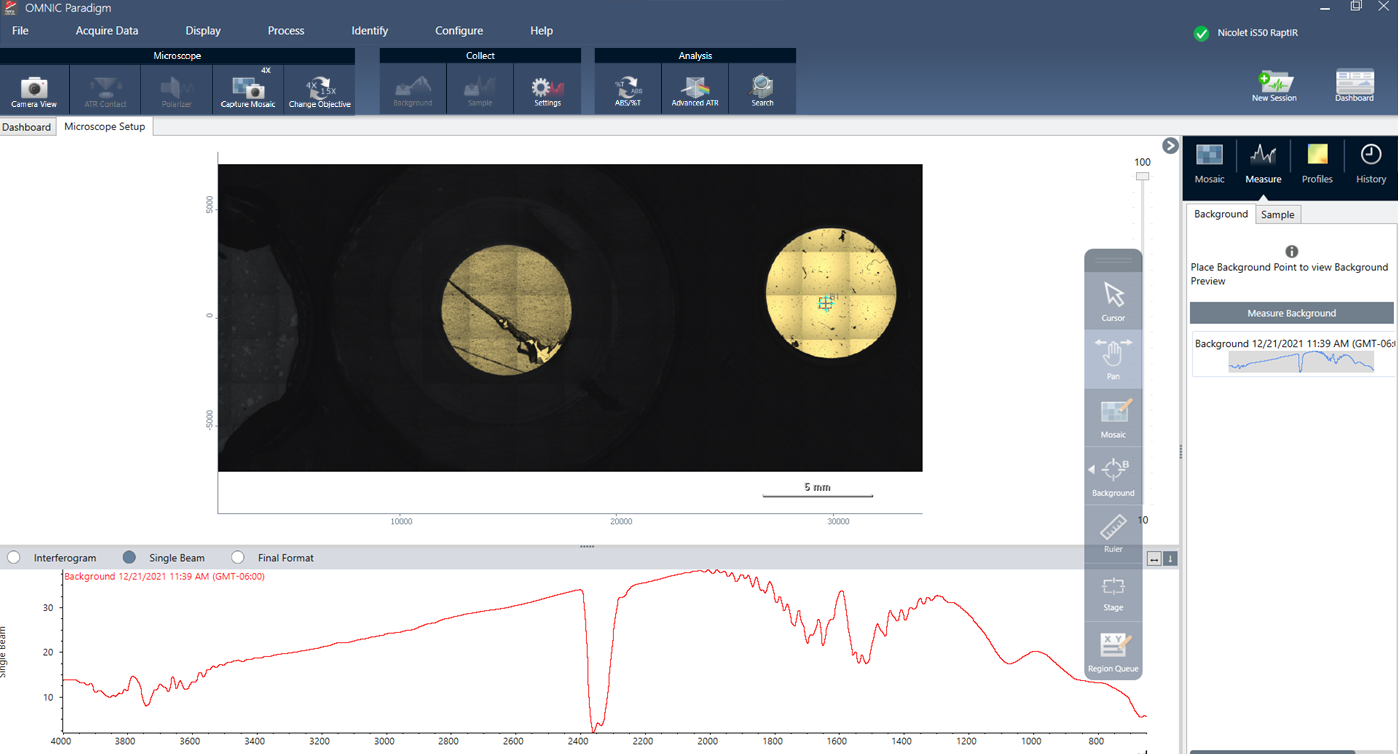
- From the floating toolbar, select the Background tool.

- Click the mosaic at the point where you want to measure the background. A live Single Beam spectrum is displayed in the spectra pane. Use this spectrum to determine if you want to use this point for your background measurement. Click the mosaic again to move the background point. For more on choosing the best background point for your sample, see"Analyze samples"
- When you are satisfied with the background point, click Accept Background. This is the opportunity to select a better background location before measuring the data.
- Click Measure Background. The background spectrum is collected. When it is complete, it is added to the Background tab of the Spectra tab.
If you are measuring multiple areas over a period of time, replace your background measurement periodically. In general, you should always have a recent measurement of the background before your measure the sample.
Analyze areas, lines, and points
Create a chemical image of an area of the sample surface by specifying one or more regions to analyze. You can also measure the sample at individual points using the point tool. You can measure areas, lines, and points together.
Measuring areas, points, and lines requires you to first capture a mosaic and measure the background.
To analyze areas, lines, and points
- Capture a mosaic.
- Measure a background spectrum.
- Specify areas, lines, and points to analyze. You can add multiple areas and points to a single analysis.
| To analyze | Select this tool | Perform these steps |
|---|---|---|
| Areas |  |
|
| Lines |  |
|
| Points |  |
|
Use the cursor tool to select or delete areas and points.
- When you are finished adding areas, lines, and points, click Sample.
- Open the Region Queue to view and refine details for all areas, lines, and points in your measurement. You can also select a background measurement to associate with each region.
When the measurement is complete, view the results in the new tab. See Next Steps for more on analyzing and sharing your results.
Analyze particles
Use the Particle Analysis tools to locate, characterize, and identify particles.
To analyze particles
- Prepare your sample.
- On the dashboard, select Analyze particles.

- Capture a mosaic.
- In the map view, review the mosaic and make any needed changes to focus and illumination. Capture a high-magnification mosaic if needed.
- Measure a background spectrum.
- Analyze particles.
- Select the Particle Analysis tool , and click and drag to draw a rectangle on the mosaic. This is the region of interest, where the software will detect particles. When you have drawn a region, the Particle Analysis pane opens.
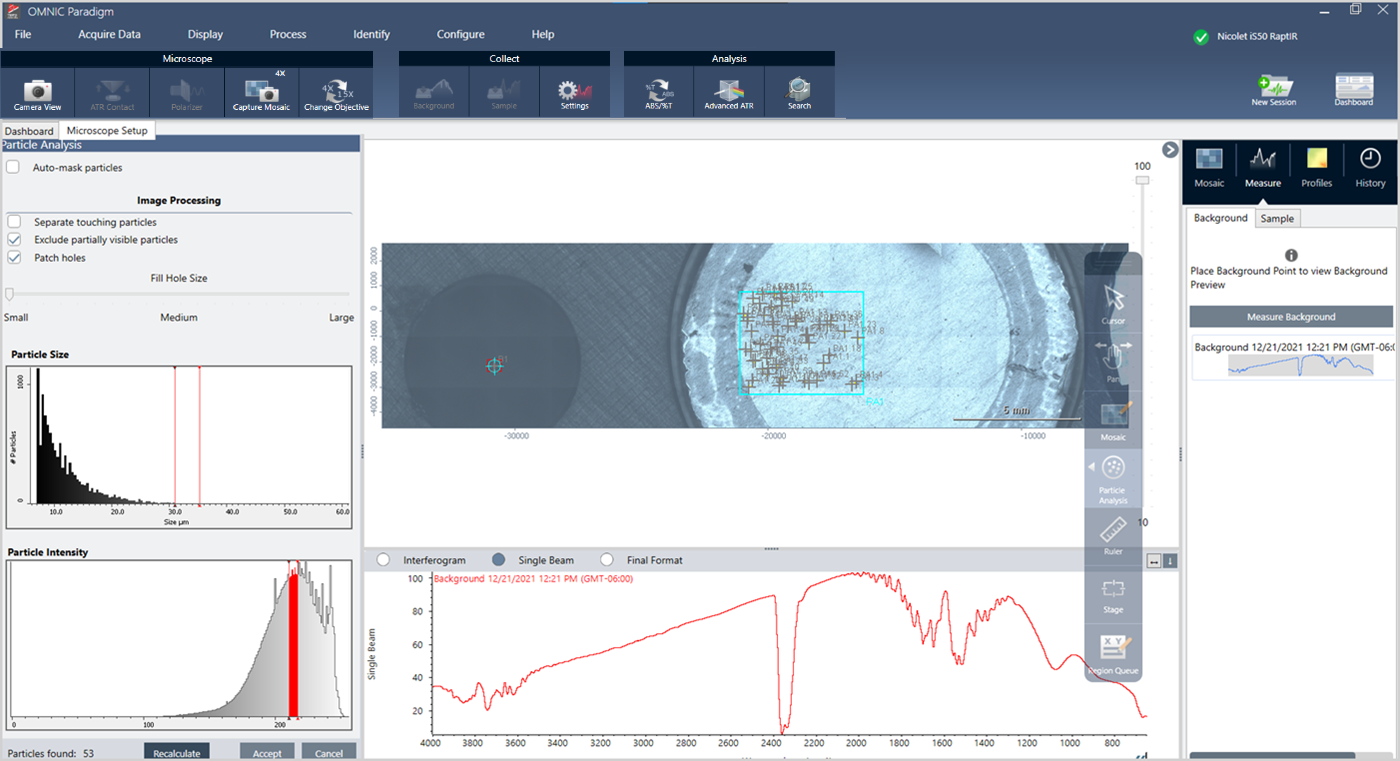
- Refine your selection using the options and selection tools. Select Recalculate after updating settings to update the particles. See the OMNIC Paradigm guides and tutorials for detailed explanations of the particle analysis tools and settings.
- When you are satisfied with your selection, click Accept. This saves the selection settings but does not yet measure the data.
- Click Sample.
- Select the Particle Analysis tool , and click and drag to draw a rectangle on the mosaic. This is the region of interest, where the software will detect particles. When you have drawn a region, the Particle Analysis pane opens.
- When the measurement is complete, view the results in the new tab. See "Next steps" for more on analyzing and sharing your results.
Next steps
- Apply profiles to visualize properties of the sample data
- Apply processing to selected spectra
- Create reports or export data
- Explore spectra further in the Spectra view.