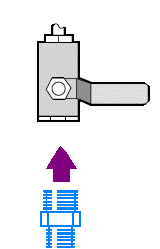
Installing a purge kit
For safety concerns, refer to the user documentation specific to any applicable accessory.
Purging your instrument protects the internal components from moisture and other environmental contaminants by maintaining an internal atmosphere of dry air or nitrogen.
If your instrument is not already equipped to purge, you must install a purge kit.
| We recommend that you maintain seal and desiccation and/or purge your instrument at all times. Equipment damage due to failure to maintain seal and desiccation and/or purge is not covered under the warranty. If you have questions about this requirement, please contact us. |
Time needed: 30 minutes or less
Tools needed:
- A 3/4 inch open-ended wrench
- An 11/16 inch open-ended wrench
- A shutoff valve with a 1/4 inch male or 3/8 inch female fitting
- Pipe tape
For best results, the purge gas should be dried to a dew point of -70 °C (-94 °F) or below. To order parts, contact us
 |
Avoid hazard. Never use flammable gas to purge your instrument. The purge gas must be free of moisture, oil, carbon dioxide, or infrared-absorbing materials. To prevent laser damage, use only dry air or nitrogen to purge your instrument. |
- Install a shutoff valve and either a 1/4 inch male fitting or a 3/8 inch female fitting on the purge gas source. (Choose a shutoff valve and fittings that are appropriate for the purge gas source.)

- If you used a 1/4 inch male fitting, proceed to the next step.
If you used a 3/8 inch female fitting on the purge gas source, install the 3/8 inch to 1/4 inch reducing nipple that was included with your purge kit. Wrap the reducing nipple with Teflon pipe tape before you install it, and use an 11/16 inch open-ended wrench to tighten the connection.]
- Wrap the reducing nipple or the 1/4 inch male fitting with Teflon pipe tape, then install the pressure coupling. Use a 3/4-inch, open-ended wrench to tighten the connection.

- Install the purge filter, pressure regulator and flow meter, and snap the assembly into the pressure coupling.

- Connect the purge kit to your instrument, set the purge gas controls, and snap the flow coupler into the back of the instrument.
