Using the Sub Workflow and Embedded Workflow tiles
With the Sub Workflow and Embedded Workflow tiles, you can run another workflow as a part of a larger workflow. Sub and embedded workflows are just regular workflows run as a step during another workflow. This is useful for keeping your workflows organized and easy to manage. For example, you might create a small workflow to perform a few processing or analysis steps, then reuse it in several other workflows. When you need to update the workflow, you can make any desired changes in one place only and then update all the workflows where it is used.

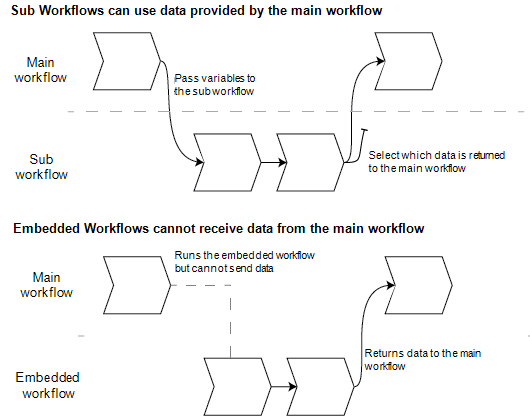
With the Sub Workflow tile, you can send data from the main workflow to the sub workflow and you can choose which data you get back.
On the other hand, when using the Embedded Workflow tile, data is only sent in a single direction: from the embedded workflow to the main workflow. You cannot choose which data to get back with an embedded workflow; you will get every variable created for it.
-
Use the Sub Workflow tile if you need to pass variables from the main workflow to the sub workflow, or if you want only a subset of the variables back from the sub workflow. You might want to use the sub workflow tile if you want to send a spectrum from the main workflow to the sub workflow for some processing and only get the resulting spectrum back without any other variables.
-
Use the Embedded Workflow tile if you do not need to send variables to the embedded workflow and you want all variables returned to the main workflow. You might want to use an embedded workflow to measure data and get the spectrum as well as all other variables available in the main workflow.
To use the Sub Workflow tile
The Sub Workflow tile requires a little setup to work correctly. You need to specify any data you want pass to and from the two workflows.
-
Create the workflow that you will use as the sub workflow. Any workflow can be used as a sub workflow or an embedded workflow.
-
Define any required input variables.
-
Open the Start tile settings of the sub workflow.
-
Select Create new input variable. When you run the sub workflow from the main workflow, this is the data that you will pass to the sub workflow.
-
Enter a variable name and select a type.
-
-
Add your sub workflow to the main workflow.
-
In the main workflow, add the Sub Workflow tile.
-
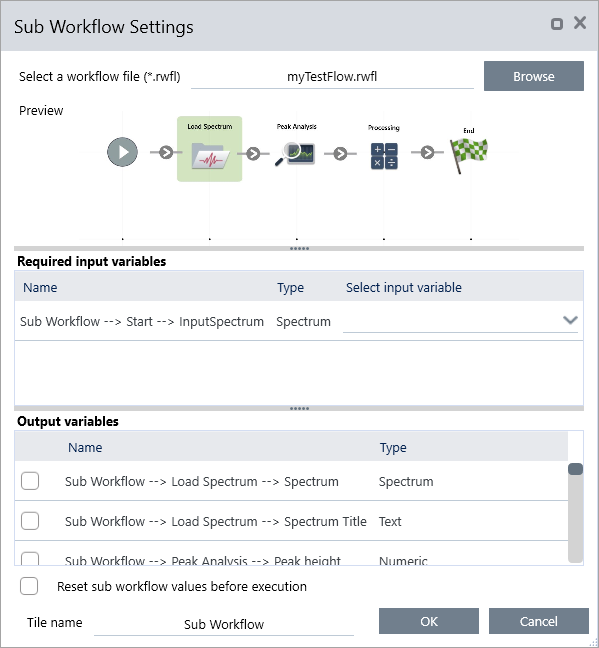
Set your sub workflow in the Select a workflow file (*.rwfl) input.
-
Specify the data to send and return.
-
Under Required input variables, you can see all the variables you set in the Start tile of the sub workflow. Enter the data you want to send for each variable.
-
The Output variables shows a list of all the variables that can be returned from the sub workflow. Select the variables you want to use in the main workflow.
-
-
If you make changes to the sub workflow, you must update it in the workflows where it is used. In the main workflow, right-click and select Update Embedded and Sub Workflow(s).
Sub Workflow Settings
|
Setting |
Description |
|---|---|
|
Select a workflow |
Select the workflow that you want to use as the sub workflow. |
|
Required input variables |
Create the required input variables in the Start tile of the sub workflow. Here, select the variable you want to send to the sub workflow. |
|
Output variables |
This area lists all the variables you can return from the sub workflow. Select the variables you want to return and work with in the main workflow. Only those that are selected will be available in other tiles in this workflow. |
|
Reset sub workflow values before execution |
Select to reset all values in the sub workflow to their default state before running the workflow. |
|
Tile name |
Enter a name for this tile. |