Paradigm SDK - Getting Started with Python
Preparation
If possible, install this on a clean PC (newly installed operating system), or in a Virtual Machine.
Overview
The basic steps that are needed before one can use the Paradigm SDK are:
- Install the base OMNIC Paradigm software for the instrument to which you are connecting.
- Install the Paradigm SDK Engine and Paradigm SDK Client modules.
- (Optional but highly recommended) Set up a Python1 virtual environment for development.
- Install the paradigm-sdk pip package and dependencies into your Python environment.
- Copy .NET config files next to your Python executable
Install OMNIC Paradigm Software
Install the Paradigm SDK
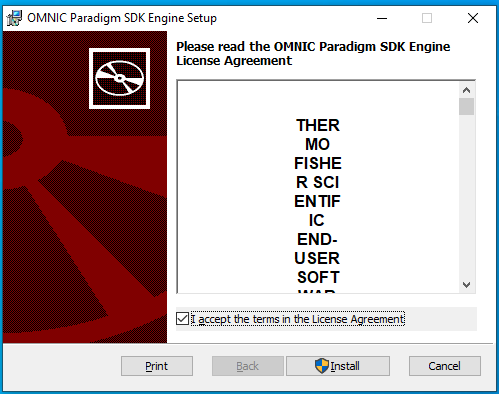
Run the SDK Engine Installer
Accept the terms of the license agreement.
Install.
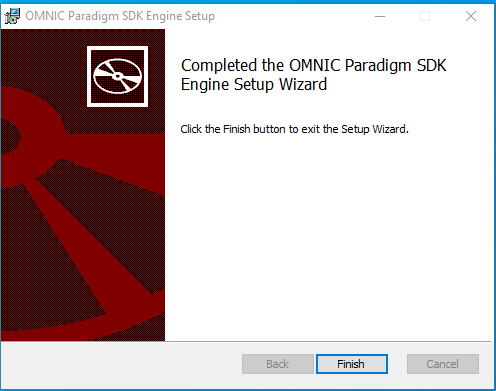
Finish.
Now find the SDK Client Installer and take the same steps to finish SDK installation.
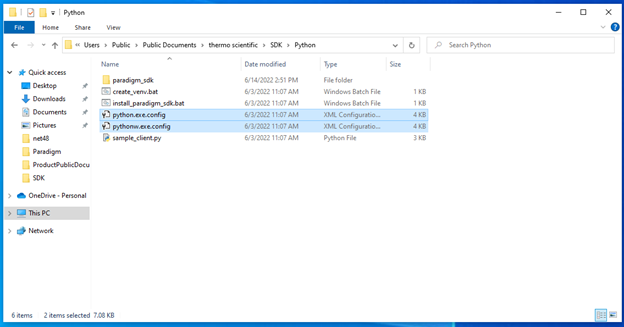
The SDK Documentation (including a copy of this document) is installed to C:\Users\Public\Documents\Thermo Scientific\SDK
Set up Python
Python is a widely used language so there are many different ways an SDK user might want to have it set up. The instructions in this section will be as general as possible to highlight the essential steps. Additionally, we provide a detailed, step-by-step example of how to set things up for Anaconda in the Appendix at the end of this document. Anaconda is an open-source Python distribution platform used by many data scientists.
Choose a Python Version
The version of Python that can be used is restricted by the pip package used to communicate with the Paradigm SDK client module. This package, called pythonnet, is required because we need to bridge the gap between the Python interpreter and the .NET CLR runtime that is used by the C# SDK client module. The python net package is compatible with 3.8 for its last stable version or 3.10 if using the alpha version. Our recommendation is to use Python 3.10 because Python 3.8 is already close to end of life (bug fix updates ended May 2021, security updates will end in October 2024).
Download Python
Python can be downloaded for free from the python.org website: https://www.python.org/downloads/
Create a Virtual Environment
A virtual environment in Python is a common development practice that can make the process of developing your software easier. Essentially, the virtual environment specifies which version of Python is running and what pip packages are installed.
By having a virtual environment, the developer can quickly create a new virtual environment and test installing different packages, running their program using different versions of Python, and many other things. Once the test or investigation is complete, the developer can return to their main environment without needing to undo the actions taken during the test.
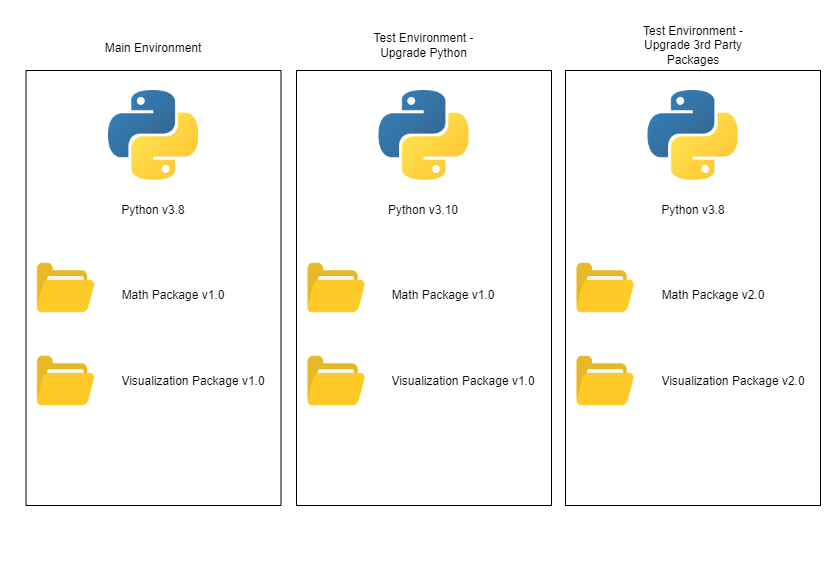
Another benefit is that virtual environments isolate your programs from other Python programs running on the same computer. For example, the Thermo Fisher Cloud Connector service uses a certain version of Python (e.g. 3.8) that is added to the Windows PATH variable. As a result, Python programs that run without a virtual environment will default to using that version rather than the latest version that you’ve downloaded.
If you are using Python with an IDE or platform like Anaconda, there is often built-in functionality that will do most of the work of setting up the virtual environment for you. Follow the instructions specific to that platform rather than running the batch file mentioned below.
The Python language comes with a package for creating virtual environments called venv. Included in your installation is a Windows batch file “create_venv.bat” that serves as an example of how to create a virtual environment. It also copies in the Python files for the paradigm-sdk package and the sample_client.py into the virtual environment’s Scripts folder. Make sure to check the file “bat_errors.txt” to see if any errors occurred.
Install the paradigm-sdk Pip Package
There is a pip package that is included with your SDK installation to be installed into your Python environment. The file “install_paradigm_sdk.bat” (located inside your my-venv folder) executes the steps necessary.
-
Install the “build” package using
pip install -–upgrade build -
Install the alpha version of the pythonnet package using
pip install -–upgrade pythonnet==3.0.0rc6 -
Install the paradigm-sdk package using
pip install <filepath to paradigm_sdk folder>
If running the .bat file, make sure to check the file “bat_errors.txt” to see if any errors occurred.
Copy in the .NET Config Files
The SDK Client module requires an “.exe.config” file in order to find all the .dll files it needs. When writing an application in a .NET language (e.g. C#, VB.NET, etc.), this file is automatically generated and included with the final program. Since Python is not one of these languages, we need to manually provide this file and place it next to the Python executable that is running our code.
Included in your installation are two files: “python.exe.config” and “pythonw.exe.config”. Copy both of these files into the folder containing the Python executable that is running your program. The two files are for the two different executables used by Python: python.exe is used for command-line applications, pythonw.exe is used for all other programs like GUI applications or automated scripts with no UI.
An easy method of finding your Python executable is to use these lines of Python code:
    import sys
    print(sys.executable)
    quit()
Note that in this example python.exe is located at:
“C:.exe”
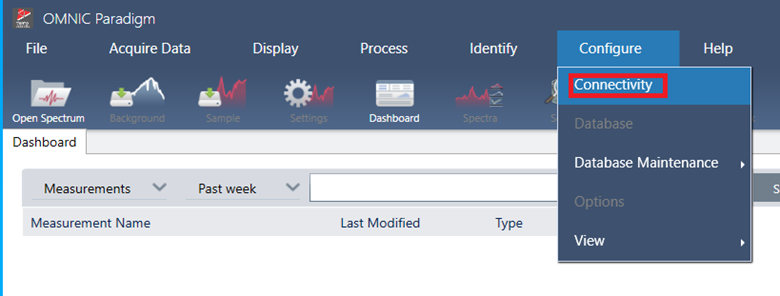
Configure OMNIC Paradigm software
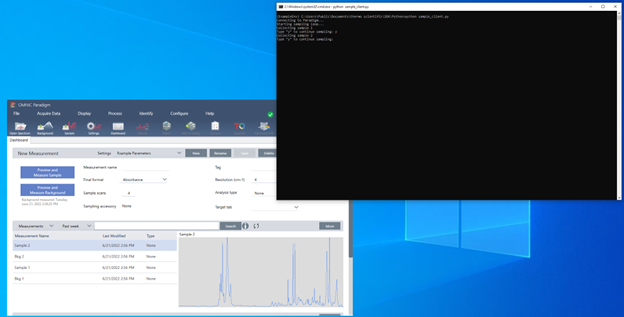
Start OMNIC Paradigm from the desktop
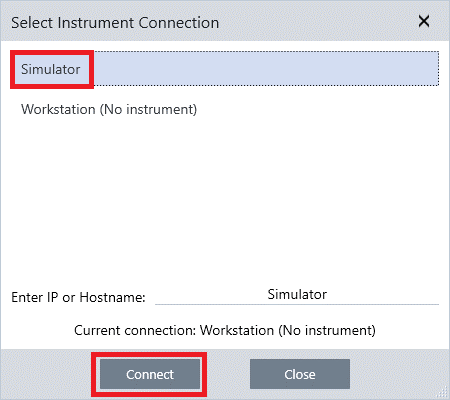
Simulator (Optional)
If you do not have an instrument, you can use the simulator:
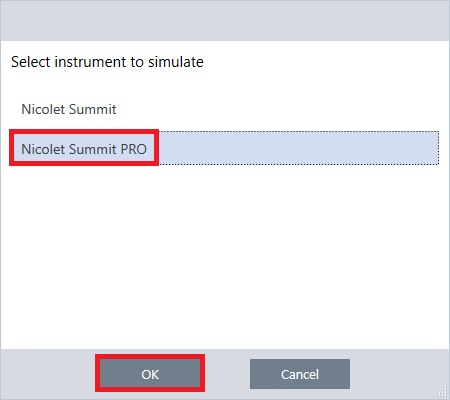
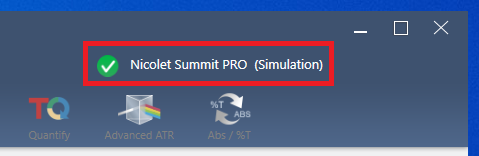
Notice that Paradigm indicates it is now simulating an instrument:
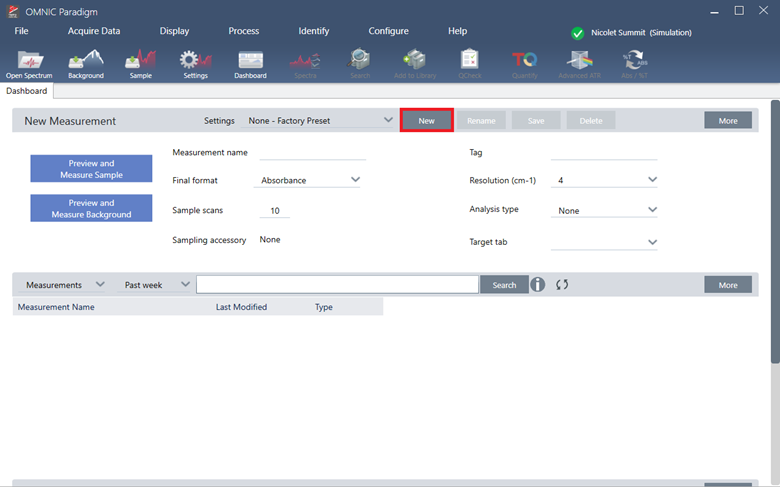
Configuring Named Parameter Sets
The SDK will use named parameter sets from OMNIC Paradigm software. We will create one now named “Example Parameters”.
Select New
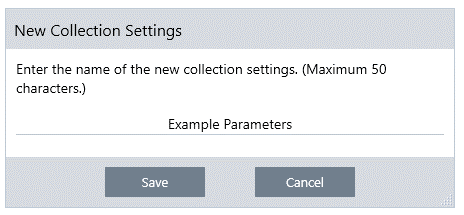
Enter the name “Example Parameters” and select save
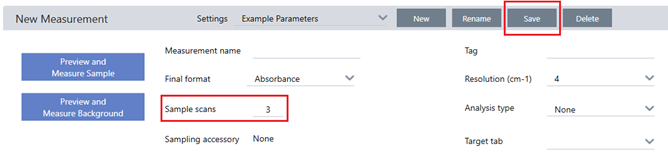
Make any changes to the Parameters that you want. For example, change sample scans from 10 to 3. Notice that the Save button is now active. Save the changes.
USE THE SDK
We have provided an example python application that acquires spectra. It is located in this folder:
“C:\Users\Public\Documents\thermo scientific\SDK\Python”
It is named sample_client.py
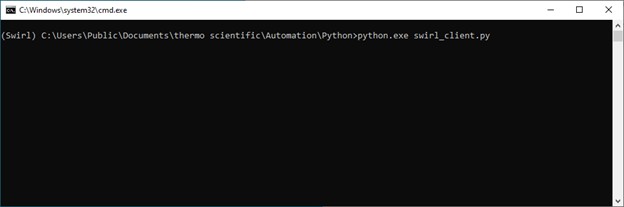
Go to:
“C:\Users\Public\Documents\thermo scientific\SDK\Python using the ExampleEnv command window.”
Run:
$ python.exe sample_client.py
Appendix
Troubleshooting Tips
-
Be sure to check that the version of Python you are running is what you expect. Follow the steps outlined in “Copy in the .NET Config Files” to see which executable is running.
-
If you are getting the error message “System.IO.FileNotFoundException: Unable to find assembly ‘ParadigmLib’”
- Check that the SDK .dll’s are installed into C:\Program Files\Thermo Scientific\SDK Client
-
If you are getting an error message like “System.IO.FileNotFoundException: Could not load file or assembly ‘Microsoft.Extensions.Logging, Version=2.0.0.0, Culture=neutral, PublicKeyToken=adb9793829ddae60’ or one of its dependencies. The system cannot find the file specified.”
- Check that the python.exe.config and pythonw.exe.config files are present in same directory as the Python executable you are using.
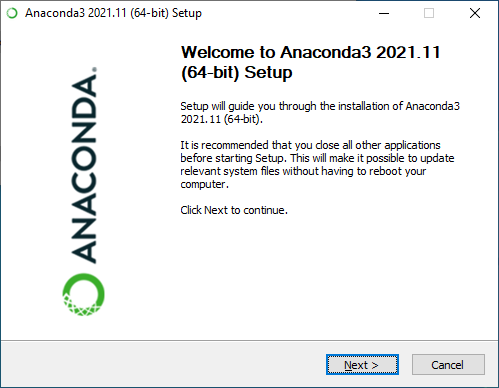
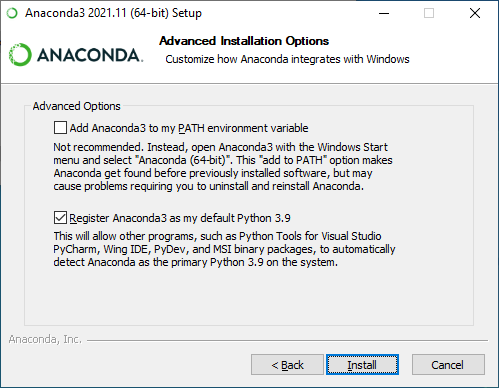
Install Anaconda Detailed
Follow the link
Anaconda - https://www.anaconda.com/products/distribution
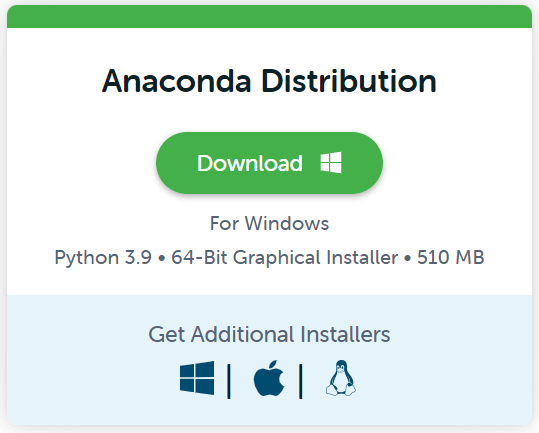
Download Anaconda
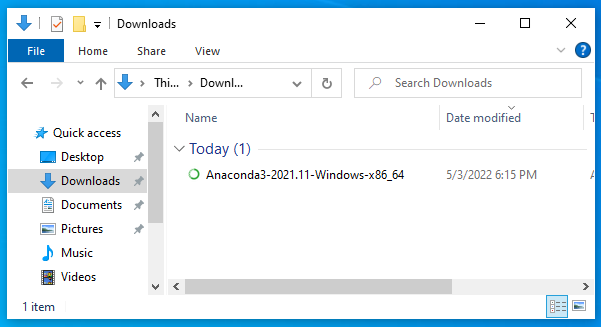
Run the installer
Configure Anaconda Detailed
Run the Anaconda Navigator
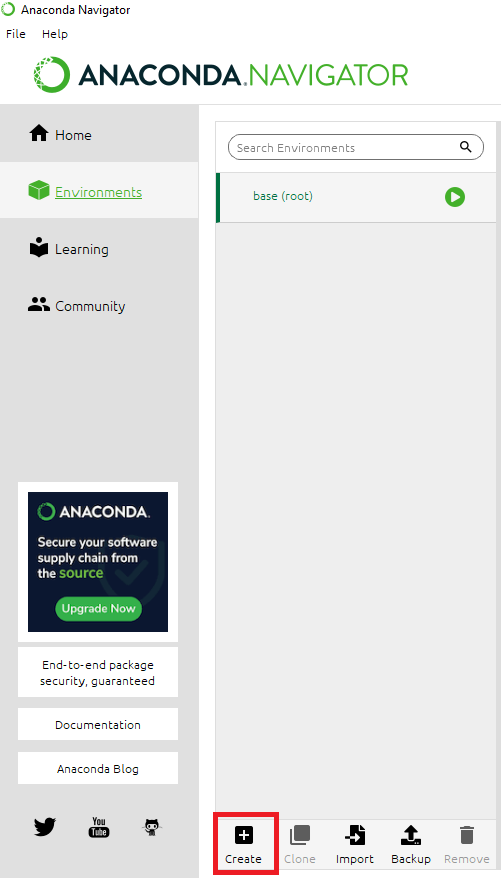
Create a Virtual Environment
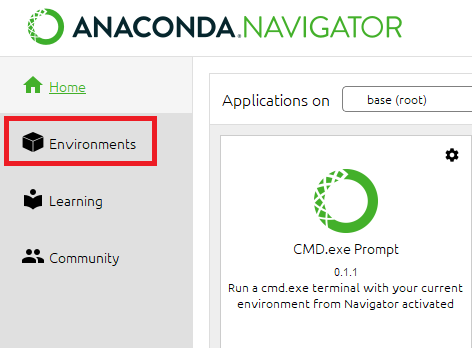
Select Environments
Select Create
Fill in the name and select the version of Python you will be using. Create the environment.
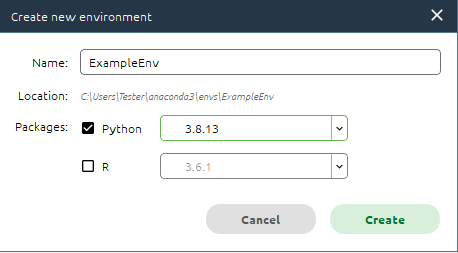
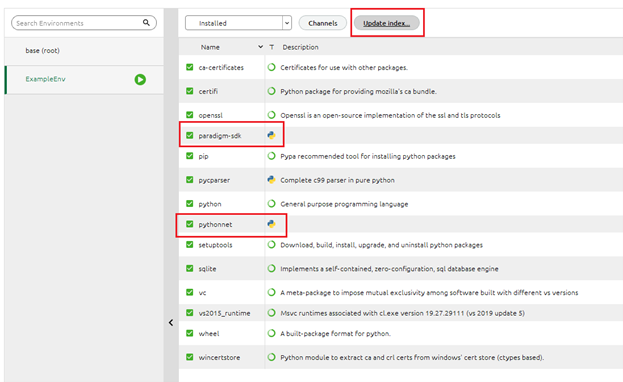
You now have a virtual environment with the following packages installed:

Set up the Config files for Python
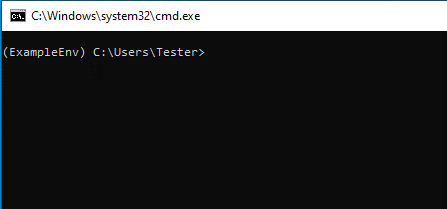
Open a terminal for your virtual environment
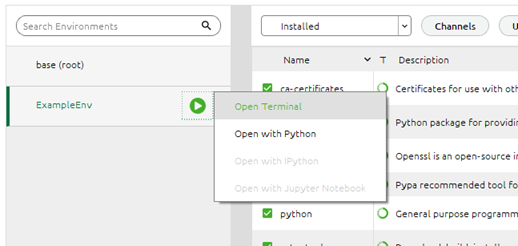
Notice the (ExampleEnv) name in the command prompt.
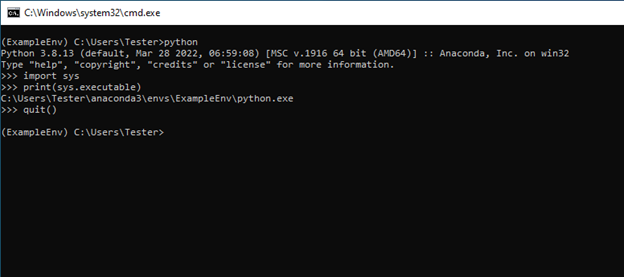
Determine where python is installed:
In the command prompt enter:
$ python
Python is now running in the command prompt
Enter each line of code below:
    import sys
    print(sys.executable)
    quit()
Note that in this example python.exe is located at:
“C:\Users\Tester\anaconda3\envs\ExampleEnv\python.exe"
Go to:
“C:\Users\Tester\anaconda3\envs\ExampleEnv\python.exe”.
Find the two .config files there and copy them to the clipboard.
Go to the python.exe install folder. In this example it is
“C:\Users\Tester\anaconda3\envs\ExampleEnv\python.exe”.
Copy the two config files to this folder.

Install Python Support Files
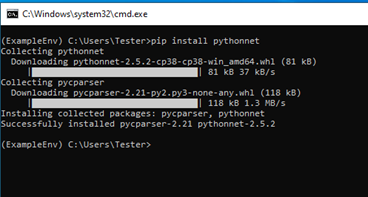
Install pythonnet:
$ pip install pythonnet
Navigate to:
“C:\Users\Tester\anaconda3\envs\ExampleEnv\python.exe”
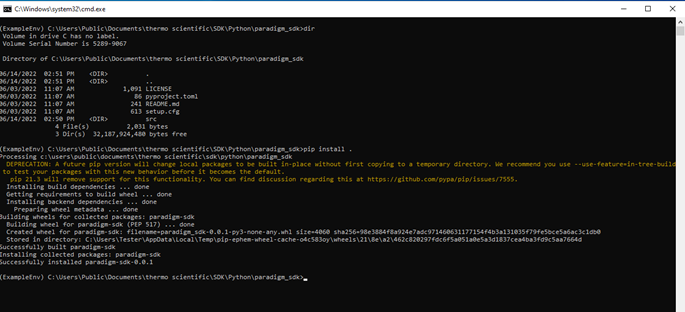
Install the paradigm sdk:
$ pip install .
You can ignore the deprecation warning. Notice that final line says that paradigm-sdk was successfully installed.
Return to the Anaconda navigator and update the index. Notice that pythonnet and paradigm-sdk are now installed: