Recommended Windows Settings for Exactive Systems
Issue
Upgrade to a Windows 10 computer from a Windows 7 computer
Environment
Windows operating system installed on these instruments:
-
- Exploris Series
- Eactive Plus
- Exactive Plus EMR
- Q Exactive
- Q Exactive Plus
- Q Exactive HF
- Q Exactive Focus
- Q Exactive HF-X
- Q Exactive UHMR
Resolution
All Exactive series instruments (except Exactive classic) can be upgraded from Windows 7 to Windows 10 2019 LTSC. Only Windows 10 2016 LTSB and 2019 LTSC are compatible with these instruments.
For this upgrade, please order the new PC (Dell Optiplex XE3) with Windows 10 2019 LTSC, using the part number BRE0023909. The software is not pre-configured, so please follow the steps mentioned below to correctly configure the new PC. It is not required to have an internet connection for this setup, just the time synchronization will fail, which is fine. However, Internet connection is required for downloading the required software, which can be then transferred to the customer PC via USB or other means. It is divided into 3 parts, please follow them serially.
Recommended Windows Settings
Follow these steps to verify the settings were properly applied.
This section shows the related Windows settings for the each script item as reference. It is optional to modify these settings.
Power Options
Under Control Panel > Hardware and Sound > Power Options the recommended setting for the power plan are listed below.
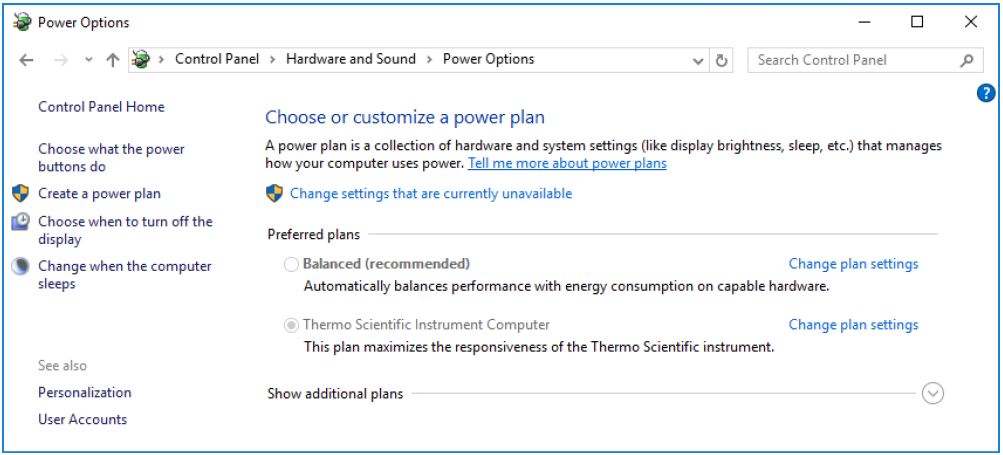
Click Change plan settings to view the settings.
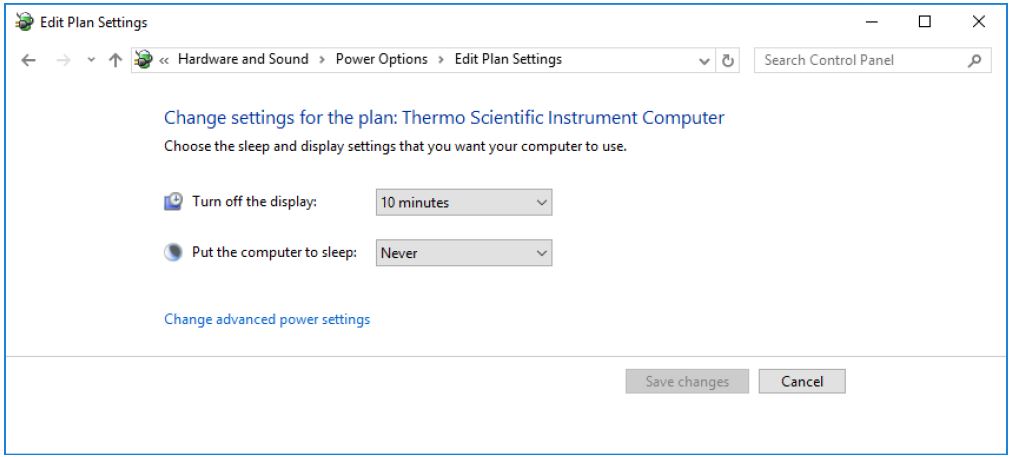
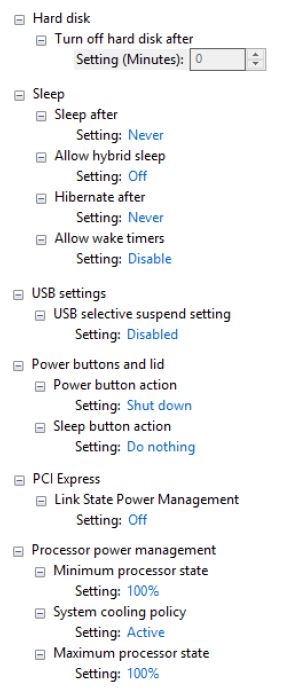
Click Change advanced power settings to view the settings.
Advanced power settings are:
 USB Power Management
Under Control Panel > Hardware and Sound > Devices and Printers > Device manager: “Allow the computer to turn of this device to save power” needs to be unchecked for each of the device under Universal serial Bus controller with Power Management Settings.


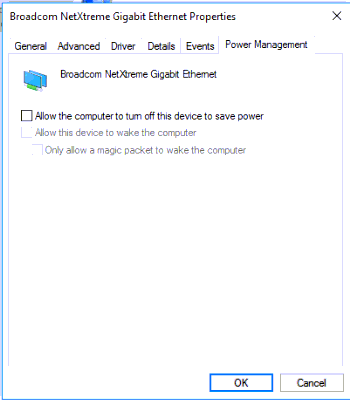
Network Card Power Management
The boxes under Power Management for the Network card should be un-checked.
Local Group Policy Windows Updates
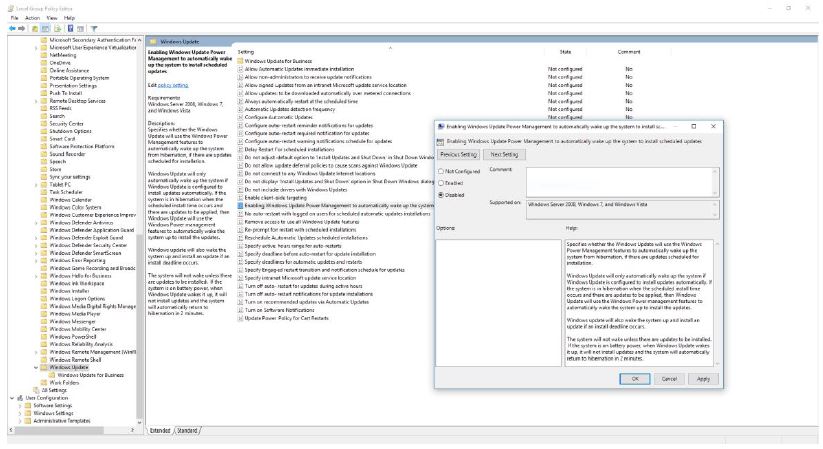
For doing so, [Windows Key]+R has to be pressed, and “gpedit.msc” has to be executed. Under Local Computer Policy > Computer Configuration > Administrative Templates > Windows Components > Windows Update, the following settings have to be chosen. Right-click on each setting and choose Edit to open the dialog box.
Enabling Windows Update Power Management to automatically wake up the system to install scheduled updates: Select Disabled. Click on OK.
Configure Automatic Updates: Select Enabled and Configure automatic updating option 3 - Auto download and notify for install. Click OK.

No auto-restart with logged on users for scheduled automatic updates installations: Select Enabled. Click OK.

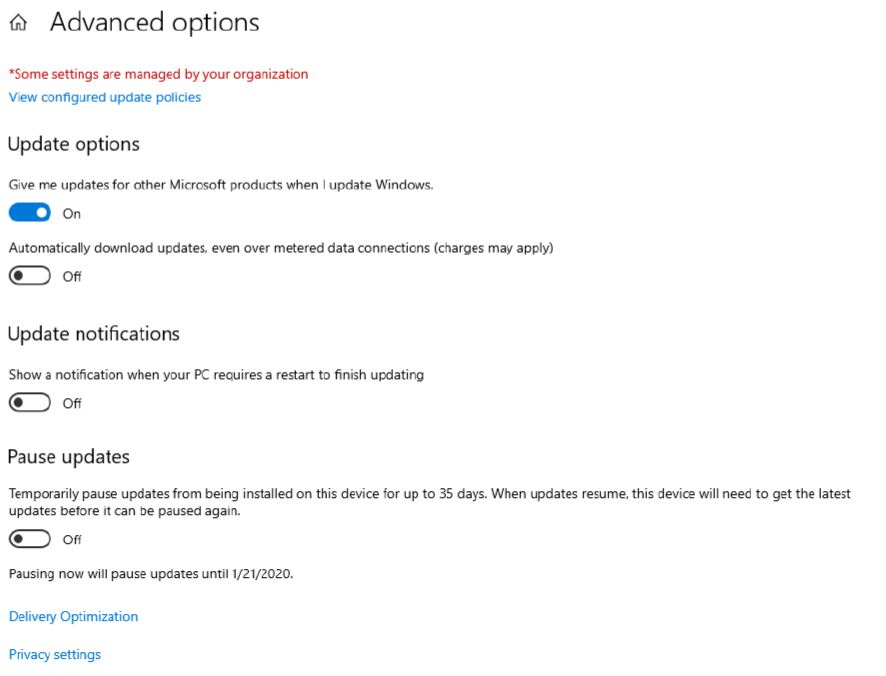
Give me updates for other Microsoft products when I update Windows
Under Settings > Update & Security > Windows Update > Advanced options: Turn On “Give me updates for other Microsoft products when I update Windows”
Disable Remote Assistance
Under Control Panel > System and Security > System > Advanced system settings: uncheck Allow Remote Assistance connections to this computer and click Don’t allow remote connections to this computer.

Telnet
Under Control Panel > Programs > Programs and Features > Turn Windows features on or off: check Telnet Client

Network Adapter Internet
Under Control Panel > Network and Internet > Network Connections: configure and rename the connection for Intel(R) Ethernet Connection I219-LM

Network Adapter Instrument
Under Control Panel > Network and Internet > Network and Sharing Center > change adapter settings: configure and rename the connection for Intel(R) Ethernet Server Adapter I210-T1.

 .NET Framework 3.5
Under Control Panel > Programs > Programs and Features > Turn Windows features on or off: check .NET Framework 3.5 (includes .NET 2.0 and 3.0)

.Net WCF MSMQ Activation
Under Control Panel > Programs > Programs and Features > Turn Windows features on or off: check .NET Framework 4.6 Advanced Services > WCF Services > Message Queuing (MSMQ) Activation

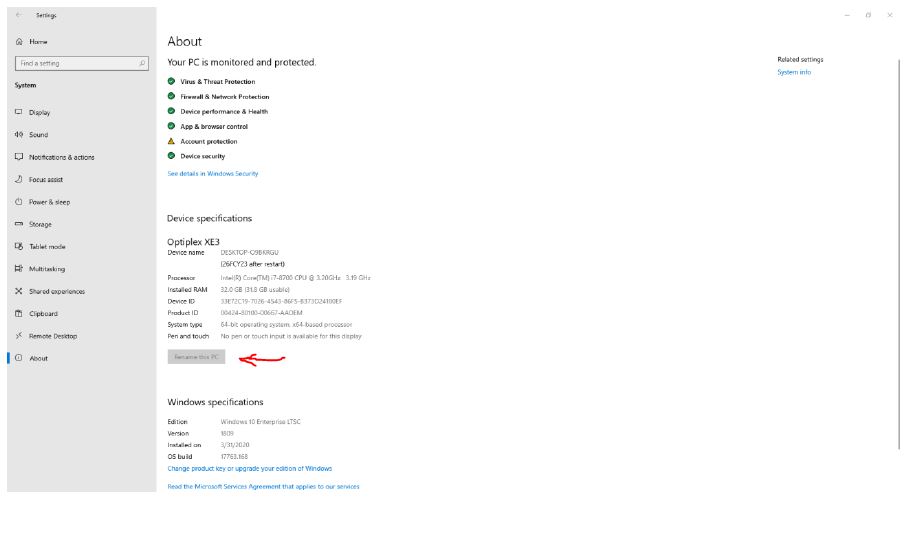
 Rename Computer
Caution should be used when changing the name of the computer if SII or Chromeleon is already installed.
Under Settings > System > About: match the PC name with the Dell Service Tag. Restart the computer.
Note: New name is listed on this page and will change when the computer is restarted
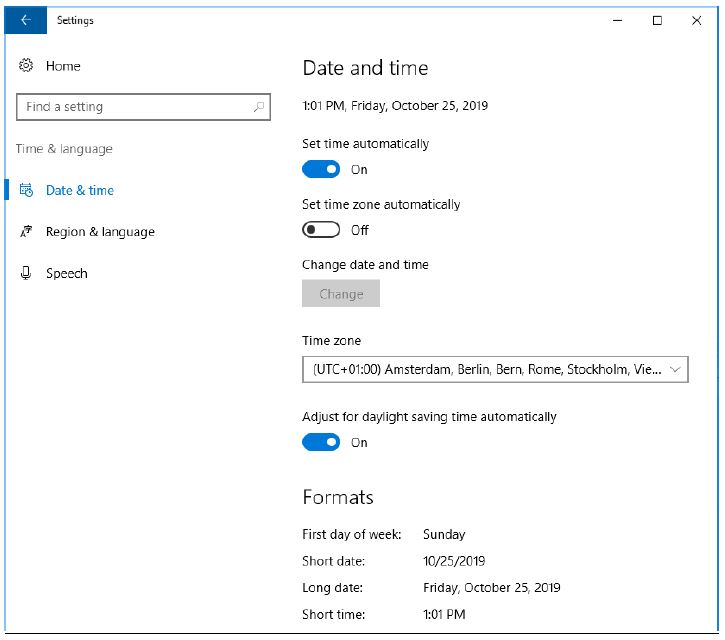
Time Synchronization
Under Settings > Time & language > Date & time: set the current date and time. To manually Change date and time, turn Off the setting Set time automatically.
Homepage of Internet Explorer
Set the homepage of Internet Explorer to https://corporate.thermofisher.com.