Correct Spectral Baseline
Correct spectral baseline
Use Baseline Correct in the Process menu to correct tilt or other problems with the spectral baseline. Correct the baseline automatically to quickly correct tilt or manually to carefully correct other undesirable characteristics.
Automatic baseline correction
Automatic baseline correction works well to correct baseline tilt and other common baseline problems.
To apply automatic baseline correction, while viewing your spectrum, go to the Process menu and select Baseline Correct > Auto.
Manual baseline correction
Manual baseline correction is useful for precise corrections to your baseline.
Use manual baseline correct to correct a sloping, curving, shifted or otherwise undesirable baseline of a spectrum so that the baseline appears flat and near zero absorbance units (or 100% transmittance). You can correct the baseline of a spectrum with any Y-axis units, but it is usually easier to select baseline points and see your changes if the spectrum is in absorbance (or Kubelka-Munk or log (1/R) units) rather than in % transmittance (or % reflectance). To convert a spectrum to absorbance units, use the Display menu. After the correction, you can convert the spectrum back to its original units.
When you use this command, you specify the baseline points for the correction. If a baseline just has a simple tilt without other undesirable characteristics, you can use Automatic Baseline Correct to correct the baseline automatically, with the baseline points selected by the software.
Correcting a baseline manually
Correcting a baseline manually involves clicking points on (or near) the baseline of the original spectrum displayed in the lower pane of the Baseline Correct window. While you modify the points on the new baseline, the upper pane shows the result of the baseline changes.
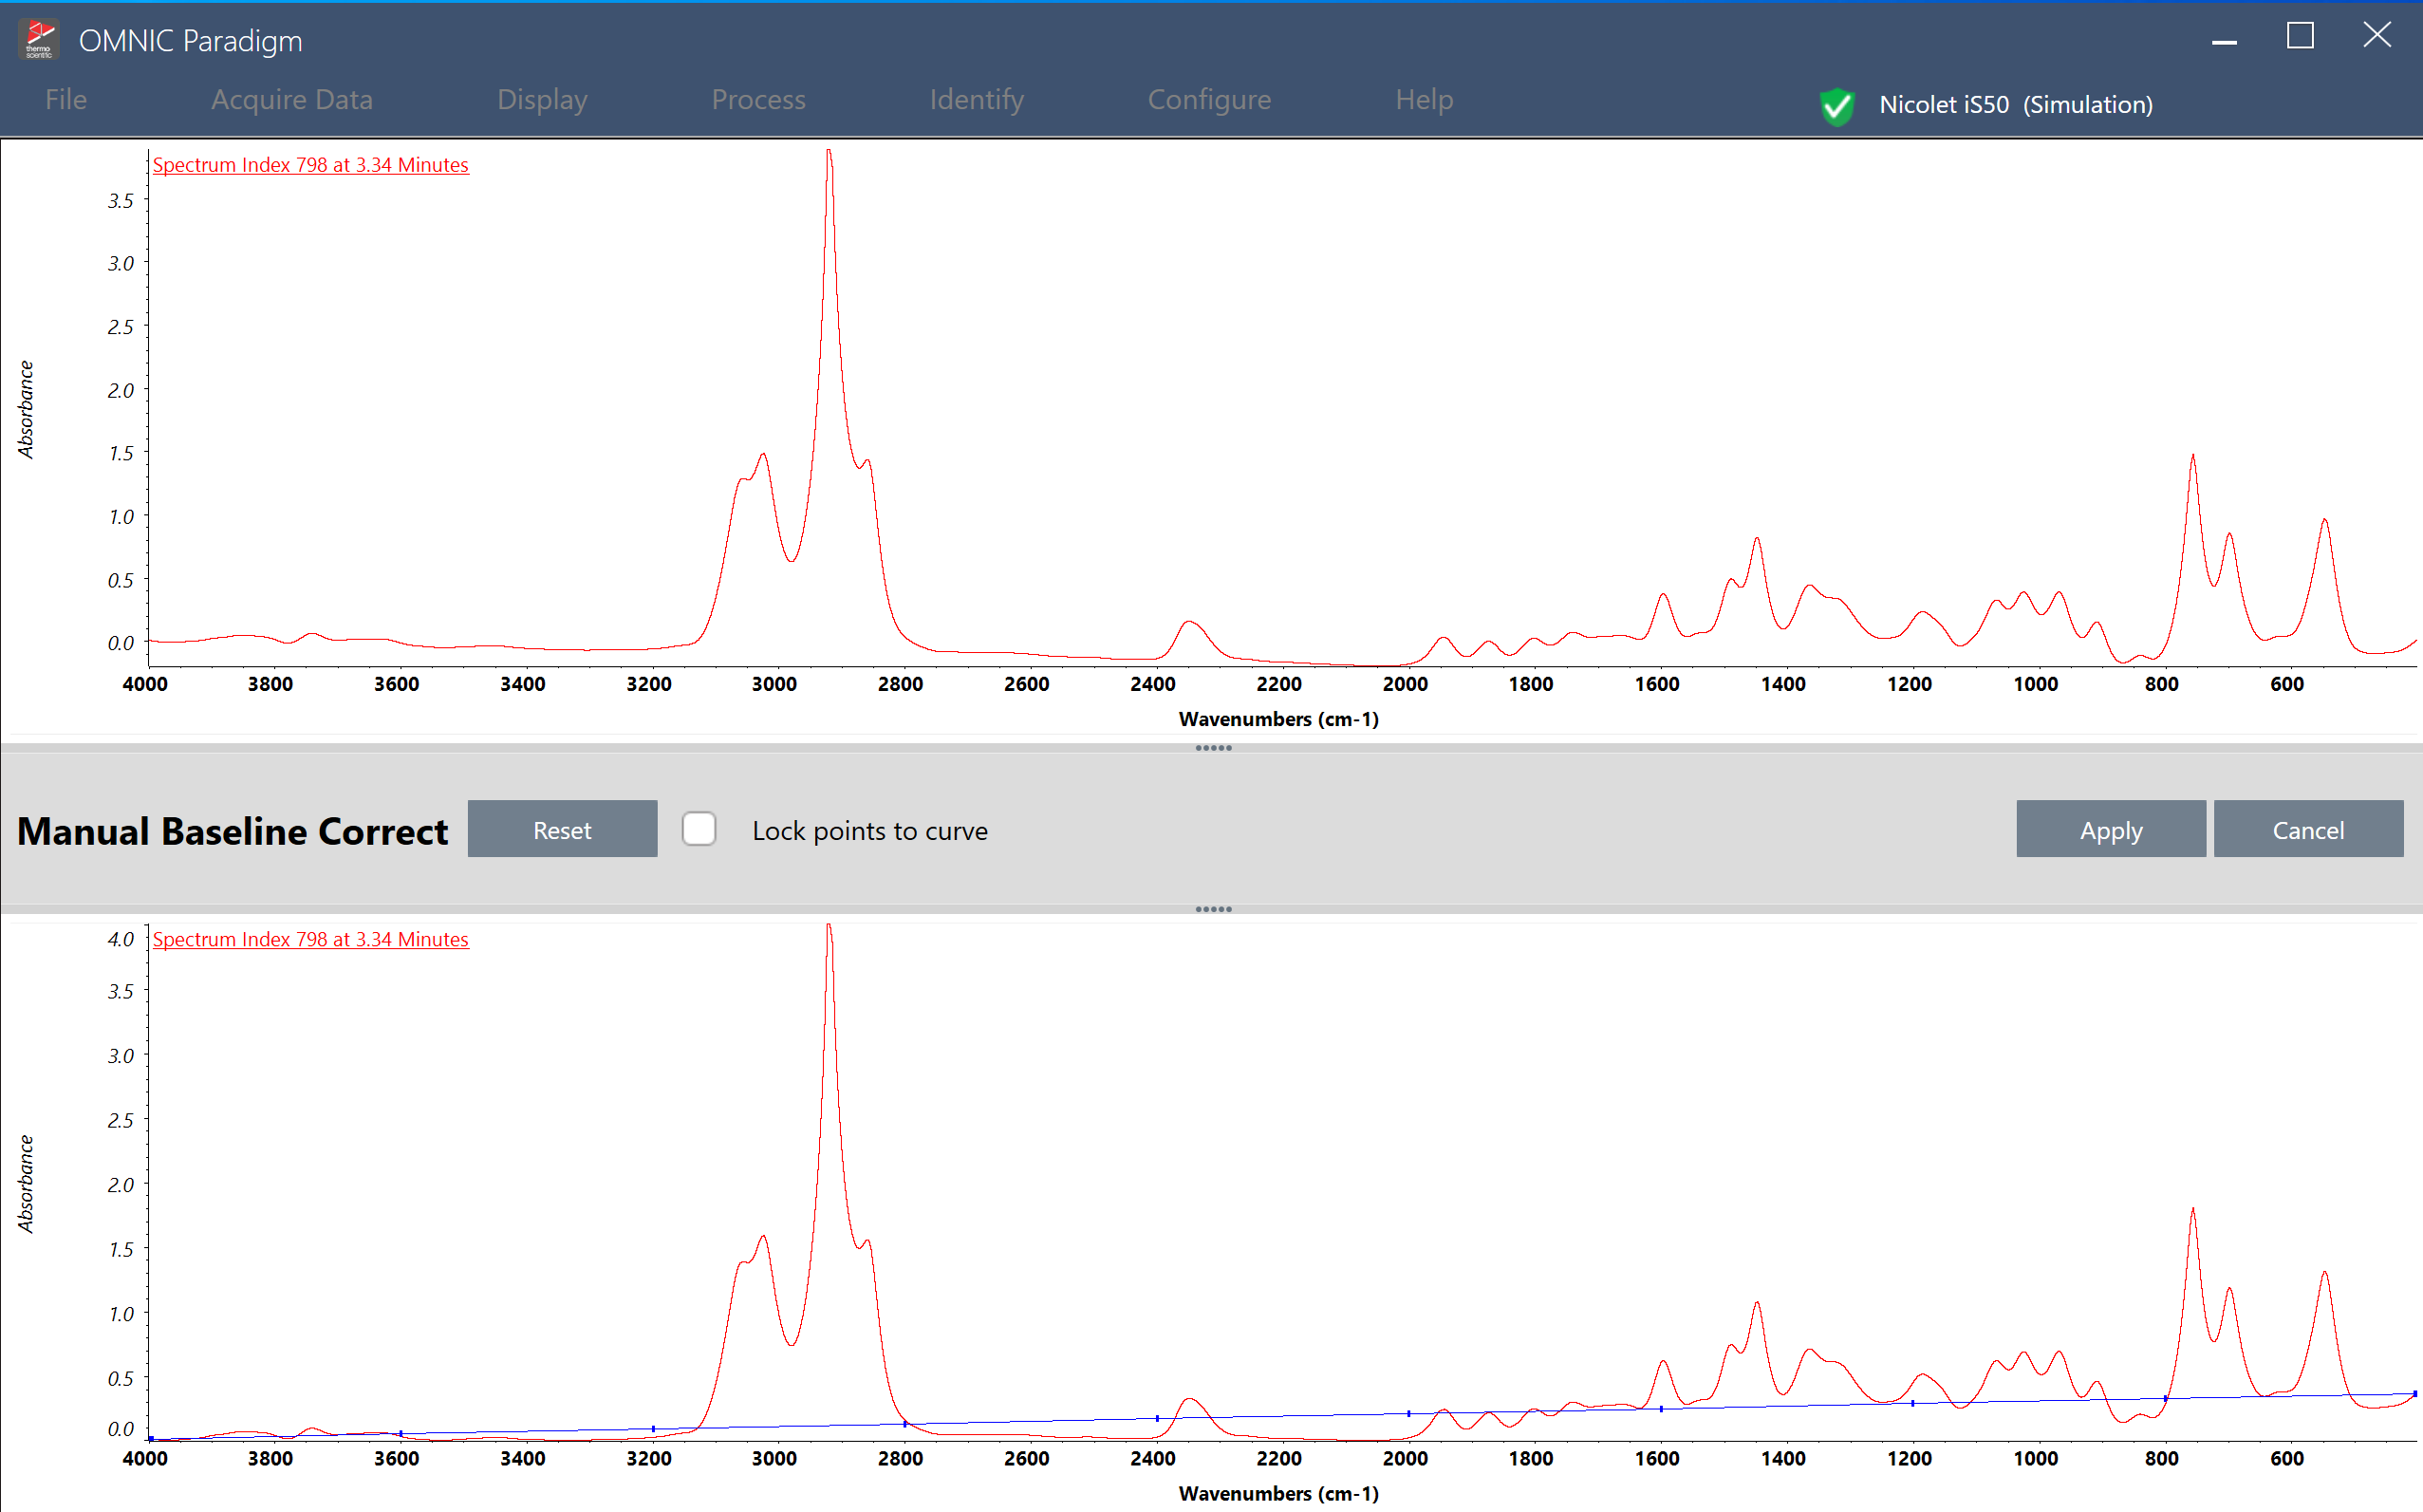
Click and drag an existing point to move it or click anywhere on the blue line to add a new point. You can add or delete points to determine how precisely you fit the baseline.
By selecting points carefully, you can correct the baseline without clicking a large number of points.
In general, you should click points at the beginning and end of baseline regions that need to be corrected and "low points" above zero absorbance (or high points below 100% transmittance). When the clicked points are brought to zero absorbance (or 100% transmittance), the points between the clicked points will also be shifted so that their vertical position relative to the nearest clicked points is maintained.
To lock points to the original spectrum, select Lock points to curve. With this option enabled, points can be moved along the spectrum but not above or below it.
Be careful not to introduce false peaks or other inaccuracies when you click points.
Similarly, if you click low points on both sides of a peak, the Y value of the peak will be decreased but the peak height measured from the low points will stay the same.
To apply manual baseline correction
-
With the spectrum open, go to the Process menu and select Baseline Correct > Manual.
-
In the lower pane, add, remove, and move points as you like to modify the baseline. View the preview of the spectrum in the upper pane to see how your changes affect the spectrum.
-
When you are happy with your changes, click Apply. Click Cancel to undo your changes and exit the baseline correct view.