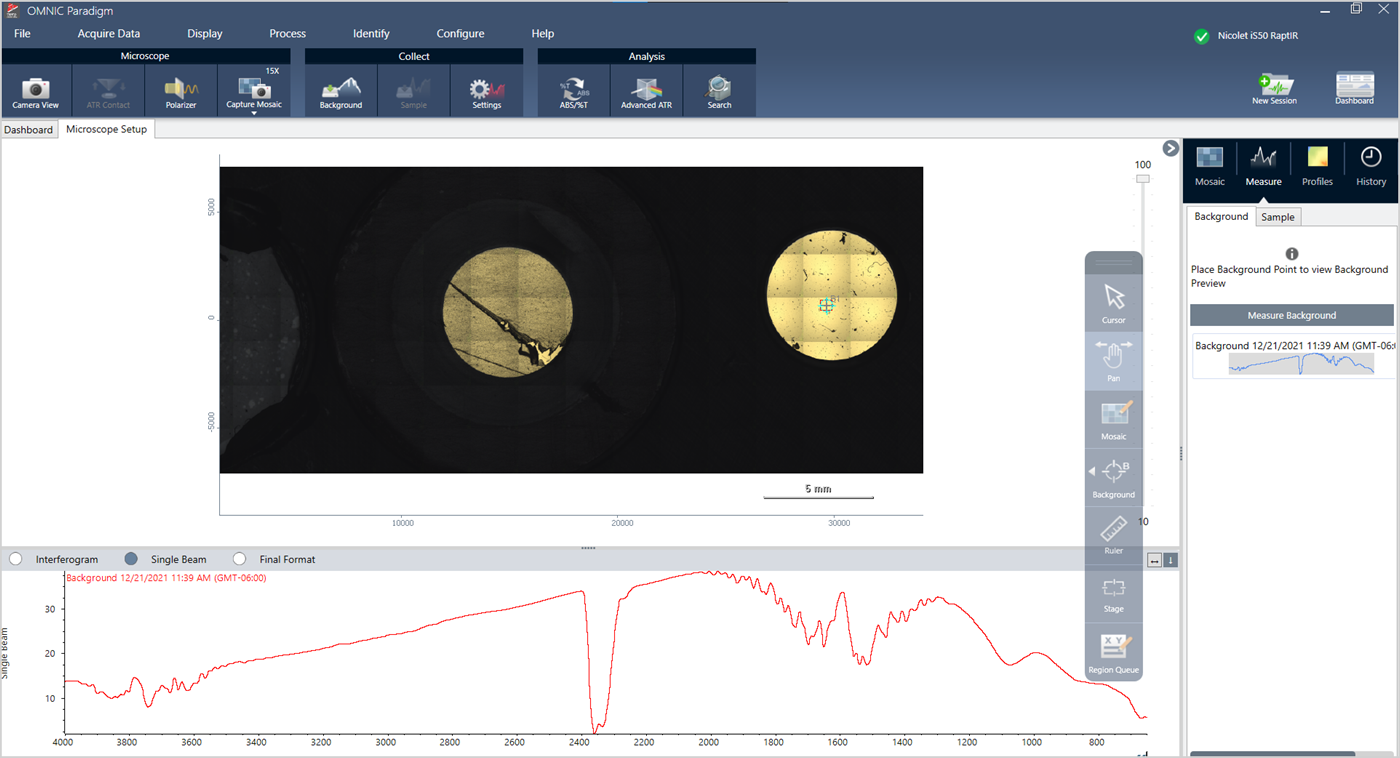
Measure a Background Spectrum
Before you collect sample data, you must measure the background. A background is a measurement of the instrument sampling conditions without any sample present. After measuring the background and the sample, the sample data is ratioed against the background measurement to create the final sample spectrum.
The best location or material to use varies depending on the sample type or application. The table below provides some suggestions for collecting backgrounds.
|
Sample type and application |
Background suggestion |
|---|---|
|
Transmission, sample suspended over air |
Air |
|
Transmission, sample on a salt plate |
An area of the salt plate where no sample material is present |
|
Transmission, sample in a compression cell |
A crystal of KBr (or other halide salt) in the same compression cell next to the sample |
|
Specular reflection |
A mirror or polished metal |
|
Diffuse reflection |
Crushed KBr, silicon carbide paper or other rough, non-infrared-absorbing material |
|
Reflection-absorption |
A mirror or polished metal, or an area of the sample support where no sample material is present |
|
ATR |
Air |
❖ To measure a background spectrum
- Start a session and capture a low-magnification mosaic.
- From the floating toolbar, select the Background tool.
- Click the mosaic at the point where you want to measure the background. A live single beam spectrum is displayed in the spectra pane. To move the background point, click the mosaic again.
- When you are happy with the single beam spectrum of the background, click Accept Background.
- Click Measure Background.The background spectrum is collected. When it is complete, it is added to the Background tab of the Spectra tab.

When the background measurement is complete, you are ready to place areas, lines, and points and measure your sample.
If you are measuring multiple areas over a long period of time, replace your background measurement periodically. In general, you should always have a recent measurement of the background before you measure the sample.

