Set and Save Measurement Options
Measurement settings allow you to specify how your sample is measured and how the data is processed after the spectrum is collected. Your settings control both how the instrument and sampling accessory measure the sample and how OMNIC Paradigm software processes the data.
After adjusting your measurement settings, you can use them immediately or save them for later use.
This guide describes how to set, save, and use common measurement options. For a discussion of advanced settings, see "Advanced Measurement Settings"
Set measurement options
Set and save your measurement settings or use previously saved settings before starting a measurement.
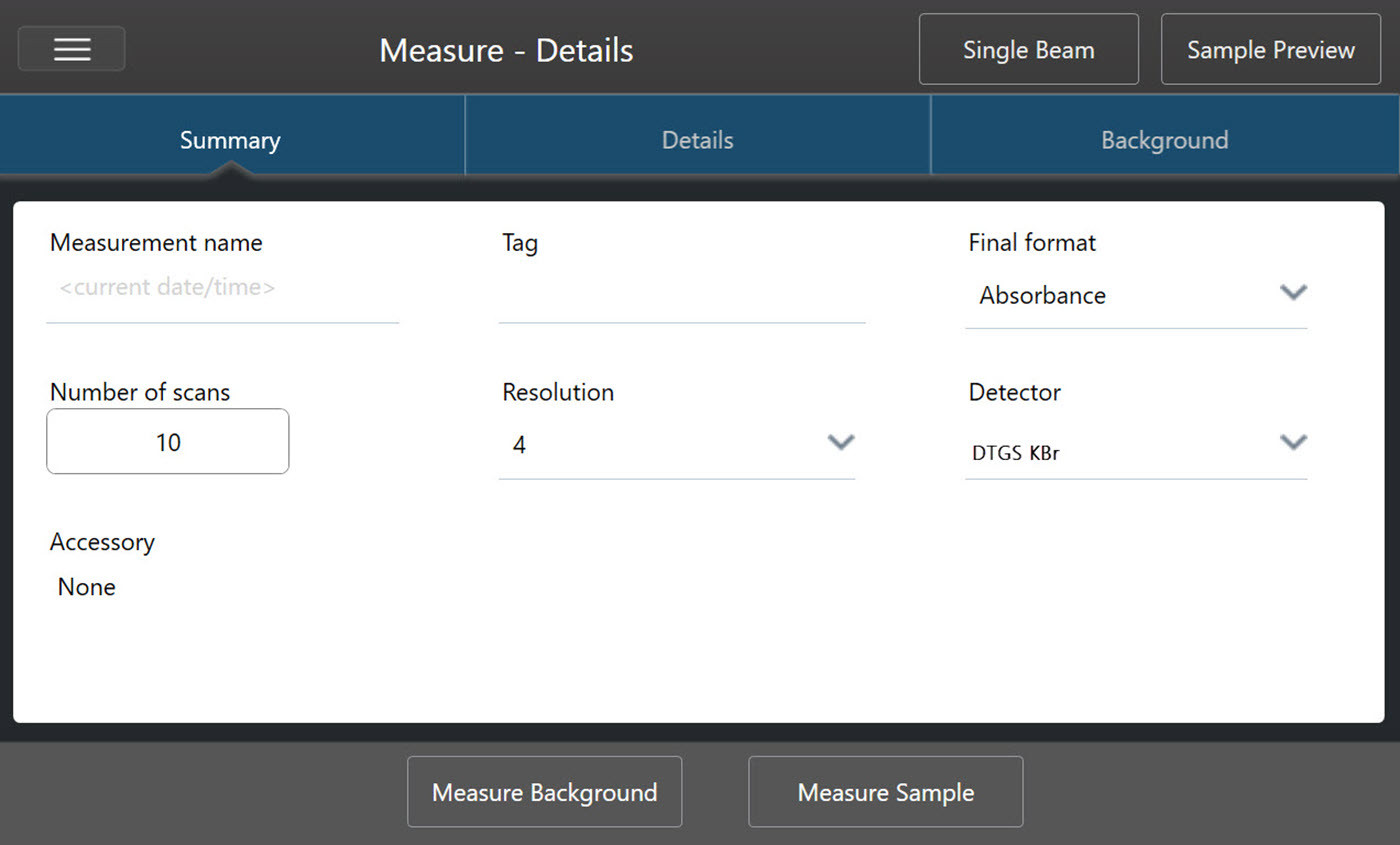
In OMNIC Paradigm software for touchscreen, edit individual settings or import a settings file (.expx) before you measure your sample. To edit or review measurement settings, select an analysis type from the home screen.
Review measurement settings in the Summary, Details, and Background tabs
When using the desktop interface, set and save your measurement settings from the dashboard, or update a few options while previewing a sample spectrum. Edit measurement settings in the New Measurement pane.
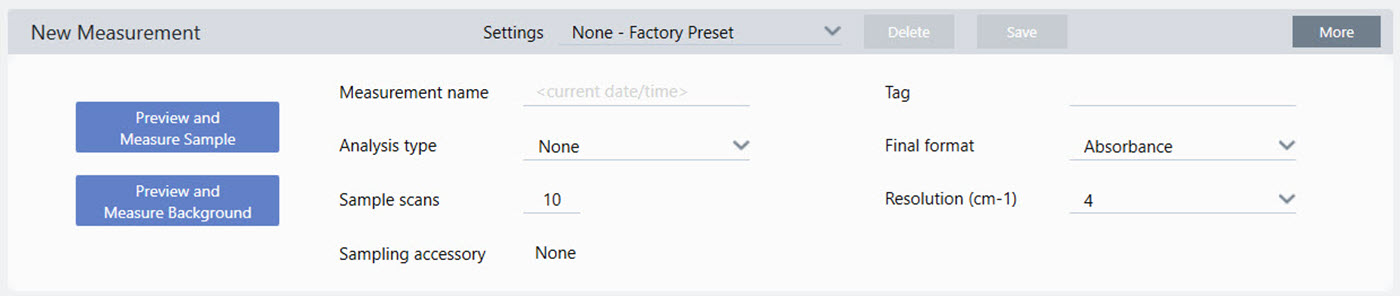
The following table describes the settings you will use most frequently.
|
Option |
Description |
Default Setting |
|
Measurement name |
The name of your sample data. This name will appear when you save or open this data and in any reports you generate. The default name is the date and time of collection. |
Date and Time |
|
Number of sample scans |
How many times the sample is scanned during the measurement. The resulting data reflects the average of all the scans. More scans will result in more accurate data but will take longer to measure. |
10 |
|
Resolution (cm-1) |
Like the resolution of a photo or video, a better resolution will mean finer detail in your spectral data. For example, a better resolution will distinguish between two very close peaks while a poor resolution might combine them. A smaller value results in a higher (better) resolution, but also takes longer to measure. Typically, resolutions of 4 are used for solid and liquid samples. For gas samples, use a resolution of 1 or 0.5. |
4 |
|
Analysis type |
With OMNIC Paradigm for touchscreen, you select your analysis type from the home screen rather than selecting from a list. Allows you to automatically process your data after it’s collected. Use None to measure a sample without additional analysis. Search performs a correlation search. Use search to identify an unknown sample. Edit search settings in the Search Setup view. QCheck results indicate a match value between your sample and a reference. Use QCheck to verify the composition of a known sample. Edit QCheck settings in the QCheck Setup view. Quantify is used to quantify the components of a sample using a pre-selected quantification method. Select Identify > Quantify Setup to specify a quantification method. |
None |
|
Tag |
Allows you to add a tag to the spectrum. Tags can later be used when searching for a spectrum. |
|
|
Final format |
Determines the units used for the collected data. You can convert your data to another Y-axis unit after collection in the View/Display menu. |
Absorbance |
|
Sampling accessory |
The sampling accessory used to measure the sample. Smart accessories are detected automatically. |
|
Save your measurement settings
You can save, edit, or delete your measurement settings only when using the desktop interface.
Name and save your measurement settings so that you can easily select them from the dashboard for later use. Settings for Search, QCheck, and Quantify analyses are not saved in these settings.
❖ To save your measurement settings
- Make any desired changes to the settings.
- Click New near the Settings menu at the top of the dashboard.
- Enter a name for the settings and click Save. Saved settings are added to the Settings list for later use.
❖ To make changes to your saved settings
- Select the named settings that you want to update from the Settings menu.
- Edit the settings
- Click Save. Your new settings are now saved under the old setting name and are available in the Settings menu.
❖ To delete your saved settings
- Select the named settings you want to delete from the Settings menu.
- Click Delete.
- In the confirmation dialog, click OK to permanently delete the named settings.
Import and export saved settings
Import a settings file to automatically update your current measurement settings to those you saved previously. When importing settings, you can import an OMNIC Experiment file (.exp) or an OMNIC Paradigm settings file (.expx).
OMNIC Paradigm software is compatible with .exp files that were created with OMNIC software. However, with OMNIC Paradigm, you can export only .expx files, which are not compatible with earlier versions of OMNIC software.
Importing an OMNIC Experiment file updates your measurement settings, but does not alter your analysis settings, such as Search Setup or QCheck Setup.
❖ To import a settings file
-
If you are using the touchscreen interface
- From the home screen, select an analysis type.
- While viewing the Summary tab, open the menu and select Open Settings.
- Select an OMNIC Experiment file (.exp) or OMNIC Paradigm settings file (.expx) file to import and touch Open.
-
If you are using the desktop interface
- From the home screen, select an analysis type.
- While viewing the Summary tab, open the menu and select Open Settings.
- Select an OMNIC Experiment file (.exp) or OMNIC Paradigm settings file (.expx) file to import and touch Open.
❖ To export a settings file
Settings can be exported only from the desktop interface. Settings files are saved with a .expx file name extension.
- Choose the settings you wish to export from the Settings list
- Select Acquire Data > Export Settings.
- Enter a name for your settings file, select a directory to save the file, and click Save. The settings file is now saved and ready for future use.